
How To
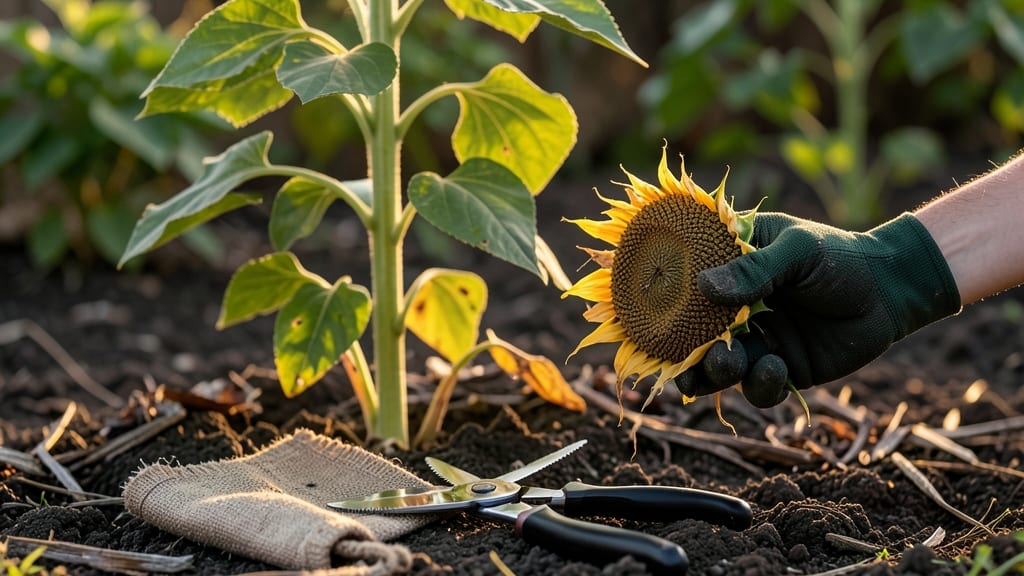
Harvest sunflower heads when the back of the petals turns fully yellow and the seed head feels dry and papery 🌻—this is the sweet spot for plump, viable seeds before birds or weather ruin your crop.
Picture this: you’ve nurtured your towering sunflowers all season, only to wake up one morning and find half the heads stripped by squirrels or flattened by rain. Knowing the exact moment to harvest can mean the difference between a bountiful seed stash and wasted effort.
Most gardeners in USDA Zone 6a can expect their sunflowers to reach harvest readiness between mid-August and September, but the real test is what you see—not just the calendar. A fully browned seed head that rattles when shaken? That’s your cue.
In this guide, I’ll walk you through the visual cues, weather conditions, and post-harvest care to ensure your seeds stay fresh and ready for planting next spring—no guesswork required.


How to identify sunflower seed maturity stages for harvesting
Harvesting sunflower seeds at the perfect moment ensures you get plump, viable seeds for planting next season. The key lies in observing three critical visual cues: the disk color, seed color, and head firmness.
Miss these signs, and you risk bird damage or seed shattering before you can collect them. Let’s break down each stage so you never miss the window again.
First, focus on the center disk of the sunflower head. When it turns from green to brown, this signals the seeds are nearing maturity. However, don’t harvest immediately—wait until the disk is fully dry and papery.
This change usually happens 4-6 weeks after flowering, depending on your climate zone. In hotter regions, this process speeds up, while cooler areas may take longer.
| Stage | Visual Cues | Action |
|---|---|---|
| Early Maturity | Disk turns light brown, petals yellow but still firm | Monitor daily for seed color change |
| Peak Maturity | Disk fully brown and dry, seeds dark gray/black, seeds rattle when shaken | Harvest immediately to prevent seed loss |
| Overripe | Disk crispy and brittle, seeds scattered or missing, head dries completely | Seeds may lose viability; use for compost or oil |
Next, check the seed color inside the head. Mature sunflower seeds should be dark gray to black, not white or green. If you crack open a seed and find it soft or moist, it’s not ready.
Pro tip: Gently shake the head—if seeds rattle loudly, they’re mature. If they feel damp or mushy, wait a few more days.
A common mistake is harvesting too early because the petals look dry. While yellow petals signal the end of flowering, they don’t guarantee seed maturity. Always double-check the disk and seeds—this two-step verification saves you from wasted effort.
I’ve learned this the hard way after cutting heads too soon and finding underdeveloped seeds inside!
Don’t overlook the head’s firmness. A mature sunflower head should feel lightweight and slightly hollow when held. If it’s heavy or spongy, the seeds are still filling out.
Press your thumb against the back of the head—if it gives slightly, it’s not ready. This test is especially useful for tall varieties where shaking isn’t practical.
Regional differences play a role too. In USDA Zone 9 or 10, sunflowers may mature 2-3 weeks earlier than in Zone 5. Pay attention to your local first frost date—if frost is approaching, harvest even if the seeds aren’t fully dry.
You can accelerate drying indoors with a fan or dehydrator to salvage the crop.
Another pro tip: Harvest in the morning when heads are dew-free. This reduces the risk of mold growth during drying. Avoid cutting heads on rainy or humid days, as moisture can spoil seeds faster.
I once harvested a batch after a downpour and ended up with moldy seeds—a lesson I won’t forget!
Finally, watch for bird activity. If you see squirrels or birds pecking at your sunflowers, it’s a sign the seeds are nearly ready. Cover heads with mesh bags or old t-shirts to protect them while they finish maturing. This simple trick has saved my entire harvest more than once!
By mastering these three key cues—disk color, seed color, and head firmness—you’ll never miss the perfect harvest window again. Grab your pruners or sharp knife, cut the head 1-2 inches above the stem, and prepare for a bountiful seed yield that’ll last for years.
Optimal harvesting conditions: weather, time of day, and post-cutting care
Timing your sunflower harvest correctly is just as important as identifying maturity—cutting at the wrong time can leave you with shriveled seeds or a field of scattered blooms.
I’ve learned the hard way that morning harvests are ideal because the seed heads are fully dry from overnight dew evaporation, and the stems are still firm for clean cutting.
The ideal weather window is a dry, sunny day with no rain forecasted for 24 hours, as moisture accelerates seed spoilage during drying.
If you’re in USDA Zone 6a, aim for late August to early September when daytime temperatures hover between 70-80°F. Cooler mornings (below 65°F) are perfect because they slow seed respiration, preserving freshness.
Avoid harvesting after heavy rain or when humidity spikes above 70%, as damp conditions invite mold and rot before your seeds even dry.
⚠️ WARNING: Common Harvesting Mistakes That Ruin Your Seeds ⚠️
Once you’ve cut your sunflower heads, strip off the petals and place the heads in a well-ventilated, dry location for 1-2 weeks. I recommend hanging them upside down in a garage or shed with a fan running nearby to circulate air and speed up drying.
The goal is to reduce seed moisture to below 10%—test this by cracking open a seed; if it’s hard and dry inside, it’s ready for storage.
For long-term storage, remove seeds from the heads and place them in paper bags or breathable cloth sacks (plastic traps moisture). Store in a cool, dark place like a pantry or basement, where temperatures stay between 40-50°F.
Label each bag with the harvest year and variety to track freshness—seeds typically retain viability for 2-3 years under these conditions.
Pro tip: If you’re saving seeds for next year’s garden, stratify them by placing them in the fridge for 2 weeks before planting. This mimics winter conditions and tricks seeds into thinking they’ve experienced a natural dormancy period, boosting germination rates.
I’ve seen up to 90% success with stratified sunflower seeds compared to 60% without this step.
Don’t forget to leave 1-2 heads unharvested on the stalk for birds and wildlife—sunflowers are a vital food source, and a little sharing goes a long way in supporting your local ecosystem.
Just make sure to harvest the rest before late September, when frost threatens to damage the remaining heads.